About Feast Everyday

Based in Corning, New York and the beautiful Finger Lakes. Started in 2009 by Barbara Blumer with her family and friends. Her husband, Tom, now regularly contributes, too.

Over 900 Recipes and still growing

From muffins to curries with step-by-step photos and how-to tips: see recipe index https://feasteveryday.blogspot.com/p/recipes-index.html

Search This Food Blog

Thursday, December 29, 2011

Tanzania Food Experiences by Emily

Bananas in Mto wa Mbu
Our niece, Emily, worked in Africa the summer before last, as part of her master's degree program in geology at Rutgers.  Here's what she has to say looking back on that experience.     --- Barbara

While I was in Tanzania eating all of these new and interesting things, I decided to start taking pictures of it for my Aunt Barbara, knowing that she would be really interested.

How to describe Tanzanian food…for the most part it’s not that different than anything I’ve had in the US, but the combinations are sometimes quite unusual. Usually because the chef is trying to recreate something that they think we like or expect, but can’t quite do it.

Lasagna
For example, I once had lasagna with cornbread cooked around the edges.

Breakfast
Breakfast many times was toast, bananas, uji, and coffee or tea. Uji is basically a hot breakfast cereal that a consistency a little more watery that oatmeal.
Uji
The kind we had was purple, and I have no idea whether or not it is always purple. With a lot of sugar, its actually pretty good, and I learned to like it. Sometimes there would also be mandazi, which is a fried bread, kind of like a donut, and delicious.
Typical Dinner
Lunch and dinner were very similar and if there were beans (think charro beans) for lunch there would be lentils for dinner and vice versa. This was paired either with spaghetti noodles or ugali.
Ugali
Ugali looks similar to mashed potatoes, but is made from corn and has a consistency more like couscous. Only very rarely was there meat except for canned tuna because there was no way to refrigerate anything.

There’s also a lot of Indian influence. We had curried potatoes and curried bananas that very much resembled potatoes.

On our way to Olduvai there is a town called Mto wa Mbu that means river of mosquitoes. Besides mosquitoes, they also grow a lot of bananas of all shapes, sizes, and colors.
Red Banana
They grow a red banana that is by far the best banana I’ve ever had. I ate two, and I don’t even like bananas.

In the beginning I was wary of eating anything raw and avoided it, but there is only so long you can eat beans and lentils before caving in. I think I lasted one day.

Surprisingly we had cole slaw a lot, and it actually was very close to Texas cole slaw. Let me tell you, it’s very strange eating a food from home on the edge of the Serengeti where there is no electricity and the water has to be brought in by truck.

There was only one thing I really didn’t like although everyone else seemed to enjoy it. Goat.

Just like everywhere else, Africans like to BBQ. They call it nyama choma, which means roasted meat or something like that.
nyama choma
In Tanzania, the process is slightly different. First you have to haggle for a goat all day because the locals are trying to overcharge you because there are Americans around. Once a price is finally agreed upon, the goat is tied to a tree where you have listen to it bleat hysterically as if it knows what is coming. Then you watch while the goat escapes, and 15 guys go chasing after it into the dark. They bring back a very distressed bleating goat that suddenly stops bleating, and about 45 minutes later a large green bucket appears with freshly butchered goat inside. Then you roast meat over an open fire until it’s cooked completely through, and that’s nyama choma.


The piece I ate in the picture still had a piece of hair on it, but that wasn’t what bothered me. I just don't like the taste of goat. It’s a very strong flavor. I think that experience might have turned some people into a vegetarian. Hah

My favorite thing was probably chapati, which is similar to naan, but better in my opinion. I’m not sure how to cook either one or exactly the difference between the two, but I could not eat enough chapati. It seemed to me like they never cooked enough because we always ran out.

       --Emily

Wednesday, December 21, 2011

Pork Chops with Beer, Cabbage and Apples

Tom's mother, Dee, gave me this recipe as her contribution to my "calling all recipes" signal for the blog.  She says that she (and now Gretchen) make it with great results.  So, we gave it a try last week when we got back from our holiday visit with them.

Tom says that it is a keeper.  I thought the flavors were excellent and it was very easy to make.  But, I am not a fan of boneless pork chops, even after the pounding she recommends.   So, I'd try it again with another cut of pork. 

Pork Chops with Beer, Cabbage and Apples
adapted from Larry Forgione, Fine Cooking, Feb/March 1998

Serves 4

4 center-cut pork chops, about 1 1/2 inches thick
salt and freshly ground black pepper
3 T. oil
1 red onion, thinly sliced
1 T. Dijon-style mustard
1/2 head Savoy cabbage (about 1 lb.), cored and thinly sliced
8 ounces mushrooms (Dee's addition)
2 tart apples, peeled, cored and cut into 1/2 inch slices
1 cup beer or ale
2 springs fresh thyme or 1/2 t. dried
1/2 cup chicken stock
Season the chops on both sides with salt and pepper.

Pound the chops to tenderize (Dee's addition). 

Heat the oil in a large, heavy skillet over medium-high heat until hot.  Add the chops and cook on one side until well browned, turn and brown other side.  Transfer to a plate and set aside.

Put the onion in the pan and cook, stirring until softened, about 5 minutes.  Add the mushrooms and continue to saute (Dee's addition).  Stir in the mustard and 1/2 t. pepper. 

Add the cabbage and apples, season lightly with more salt, and cook, stirring, for another minute.  Add the beer, thyme, and stock.  Bring to a boil and cook for about 5 minutes to intensify the flavors.

Return the chops to the skillet, burying them in the cabbage mixture. 

Cover the pan and simmer until the pork is just cooked through, about 15 minutes.  Season to taste. 

Arrange the chops on plates and top with the cabbage.

This is a Larry Forgione (he is now an Iron Chef) recipe, and he suggests serving it with pumpernickel bread.  And more beer.

B

Monday, December 19, 2011

Maddie's Melting Snowmen Sugar Cookies

Maddie's Melting Snowmen Sugar Cookies from Mary

A big "Thanks!" to everyone who is sending in recipes and stories for the blog.  There are lots of exciting blogposts coming up!
  • What I ate while working in Africa food experiences from Emily
  • Pork Chops with Beer, Cabbage and Apples, from our recent visit with Tom's mother, Dee
  • A food poetry book, sent in by Jane
  • Why I love date nut bread and recipe by Tom
  • Ethiopian Stew by Ann N.  --- we are cooking it together are her place this Thursday
  • Winter Brew Suggestions by our neighbor and beer expert, Scott B.
And today we have a photo from Mary's cell phone --- showing her daughter, Maddie's Melting Snowmen Sugar Cookies.  Maddie is home from college and is a flurry in the kitchen.

Don't worry about your photos being perfect.  Cell phone photos are fine. 

Keep those recipes and stories coming!

B

Friday, December 16, 2011

Christmas Dinner Recipes from Colleen: Short Rib Wellington and Glazed Chocolate Tart

Lots of Puff
Hi Barb,

Yesterday I did a trial run of what is likely to be our Christmas dinner.  Steve and I both saw a recipe in the Williams-Sonoma Catalog for Short Rib Beef Wellington. I made it yesterday ( it takes about 4 - 4.5 hours total with prep and baking) but it was delicious and really not that hard. Very hearty and satisfying.

I am also enclosing a recipe for a terrific tart. I think it was in Gourmet Magazine originally. Very easy, but also a bit time-consuming.


My last day of work today. Yippee! Most shopping done. Just need to wrap and bake. And bake and wrap. And try to sleep a little!

---Colleen


Short Rib Wellington Potpie

From Williams-Sonoma Christmas 2011 Catalog

Serves 6-8

2-3 lbs boneless beef short ribs, cut into 1” dice (you can use brisket)
Kosher salt and ground pepper to taste
2 Tbs olive oil
¼ pound prosciutto, cut into ¼” squares
¾ lb cremini mushrooms, quartered
8 Tbs (1 stick) unsalted butter, cut into cubes
½ cup all purpose flour
½ cup red wine
1 ½ Tbs beef demi-glace
3 cups beef stock
1 tsp. chopped fresh thyme
1 bay leaf
1 ½ cups pearl onions
¼ cup chopped fresh flat-leaf parsley
1 sheet puff pastry, 10-11” square
1 egg plus 1 tsp water, lightly beaten
1 ½ cups carrots chopped into small pieces (optional)

Preheat oven to 325 degrees.

Season beef with salt and pepper. In Dutch over, brown beef in oil over medium high heat (in batches). About 8-10 minutes per batch. Transfer to bowl. Reduce heat to medium and sauté prosciutto until crisp. Transfer to bowl. Increase heat to medium high and sauté mushrooms until tender, about 8 minutes. Add to bowl.

Pour off excess fat. Return pot to medium heat and melt butter. Stir in flour and stir 2-3 minutes. Whisk in wine and demi glace; cook for 1 minute. Slowly whisk in stock. Bring to a simmer. Add in beef, prosciutto, mushrooms, thyme, onions, bay leaf and chopped carrots, if using. Lightly season with salt and pepper. Cover pot and bake 2-2 ½ hours until beef is fork tender. Discard bay leaf and spoon off excess fat. Stir in parsley.

Increase oven to 400. Place puff pastry sheet on lightly floured board. Using sharp knife, score pastry with diagonal lines 2 inches apart forming a diamond pattern. Brush edge of pot with water. Brush pastry with egg mixture. Place pastry egg wash up over pot. Press edges to seal. Trim overhanging pastry to 1 inch. Transfer to oven. Bake until puffed and golden brown, 20-25 minutes. Let rest 20 minutes.

Note: I think it would be better to transfer the mixture to a 9x 13 baker and shape the puff pastry sheet to cover that. The handles on the Dutch oven get in the way and it is a bit hard to serve. You could also cut the puff pastry into serving size pieces and place on top of the mixture and bake so that it is easy to dish up.

   --Colleen

Glazed Chocolate Tart


Ingredients
For crust:
9 (5- by 2 1/4-inch) chocolate graham crackers (not chocolate-covered), finely ground (1 cup)
5 tablespoons unsalted butter, melted
1/4 cup sugar
For filling:
1 1/4 cups heavy cream
9 ounces bittersweet chocolate (not more than 65% cacao if marked), chopped
2 large eggs
1 teaspoon pure vanilla extract
1/4 teaspoon salt
For glaze:
2 tablespoon heavy cream
1 3/4 ounces bittersweet chocolate, finely chopped
1 teaspoon light corn syrup
1 tablespoon warm water

Equipment:
a 9-inch round fluted tart pan (1 inch deep)

Preparation
Make crust: Preheat oven to 350°F with rack in middle.

Stir together all ingredients and press evenly onto bottom and 3/4 inch up side of tart pan. Bake until firm, about 10 minutes. Cool on a rack 15 to 20 minutes

Make filling: Bring cream to a boil, then pour over chocolate in a bowl and let stand 5 minutes. Gently stir until smooth. Whisk together eggs, vanilla, and salt in another bowl, then stir into melted chocolate.

Pour filling into cooled crust. Bake until filling is set about 3 inches from edge but center is still wobbly, 20 to 25 minutes. (Center will continue to set as tart cools.) Cool completely in pan on rack, about 1 hour.

Make glaze:

Make glaze: Bring cream to a boil and remove from heat. Stir in chocolate until smooth. Stir in corn syrup, then warm water

Pour glaze onto tart, then tilt and rotate tart so glaze coats top evenly. Let stand until glaze is set, about 1 hour.

Cooks' note:

Tart is best the day it is made but can be made, without glaze, 1 day ahead and chilled. Bring to room temperature before glazing.

     ---Colleen

Thursday, December 15, 2011

Honey Persimmon Muffins

UPDATED 2020
The most common type of Persimmon is more heart-shaped, and bigger (baseball-sized), and darker orange.  It's called the HACHIYA.
Very Ripe Hachiya Persimmons - Ready to Eat

Don't eat it unless it extremely ripe and mushy, or you will get a mouth full of furry, chalky icki-ness.

Hachiya persimmons are used in baked goods, often puddings.  I decided to try muffins.

I adapted a banana nut bread recipe, by substituting honey for the white sugar, and persimmons for the bananas.

They turned out well!

---Barbara

Honey Persimmon Muffins

Makes 12

1/2 cup honey
1/2 cup light brown sugar
1/4 cup butter
2 eggs
1/4 cup buttermilk
2 very ripe persimmons, scooped out and mashed or sieved
1 t. soda
1/4 t. baking soda
2 cups less 2 T. flour
1/4 t. salt
1/2 cup chopped pecans

Mix the sugars, butter and eggs together until creamy.
Remove the top of the persimmons and scoop out the flesh. Mash or sieve.
Add the buttermilk, and the persimmons.
Mix well.
Sift the dry ingredients together and add to the persimmon mixture.
Add the nuts and stir gently until combined.
Divide evenly among 12 muffins (about 1/3 cup per slot).
And bake at 350 degrees for 25 minutes or until an inserted toothpick comes out clean.
Let cool for a few minutes.

Then, remove from pan.

B

Wednesday, December 14, 2011

Persimmons: Fuyu

Fuyu Persimmon

Persimmon trees were everywhere in Japan when we were on vacation there during October.  At first we thought they were apple trees, but upon closer inspection they were laden with orange fruit, the persimmon.

When we returned, I was surprised to see them in Wegman's, but they must be ripe in California right now.  So, I bought a few of each kind of persimmon to try.  There are two.

This is the first one we tried:  The FUYU.

To remember the difference, I think of fuyu as the tomato-looking one.  You can eat it as you would a tomato. 

The FUYU can be eaten when it is firm, as soon as you bring it home, and all the way until it goes soft. 

The taste reminds me of a cross between a plum and a mango.  Reminds a little of a peach, too.  Hard to describe. 

It's good!

B

Thursday, December 8, 2011

David's Awesome Chili - Recreated by Tom

David's Awesome Chili - Recreated by Tom

A few evenings ago David stopped by for football watching and dinner.  While we were hanging out in the kitchen, he mentioned that he had made an awesome chili that he really liked.  I asked him what was in it and whether he had taken pictures to put on Barbara's blog.  He told me the ingredients, but alas, his answer was no, he had taken no pictures.

So armed with remembering most of his ingredients plus my own knowledge of chili making, I set out to try to replicate what David had made a few nights before.  The recipe that I made has the basics of what David used plus a few of my own to enhance the flavors.  The only major difference was that he used a chipotle spiced mixture and I used ancho chilies.  My mistake, as only after I had made it did Barbara remind me that he had used chipotle flavoring and not ancho.  His was awesome, but mine was pretty darned good too!

So here goes.  This is a great meal for cold evenings like we are now experiencing.  It also makes a great leftover.

Ingredients
8-10 servings

1 lb ground chicken
1 lb ground beef
1 large onion chopped
4-5 carrots chopped
12 oz frozen corn
2 large jalapeno peppers chopped
1 can black beans
1 can dark red kidney beans
1 can garbanzo beans
1 28 oz can crushed tomatoes
1 can diced tomatoes
1 tbs minced garlic
1 package chili mix (I used McCormick's, but any brand will do.)
1 package taco mix (I used McCormick's, but any brand will do.)
1 tbs ancho chili (or chipotle for David's variant)
1 bottle dark beer or equivalent amount of water
2-3 tbs dark semi-sweet chocolate chips
2-3 tsp olive oil for sauteing
salt and pepper to taste

Dice the vegetables.

Saute in a large skillet over medium-high heat all of the chopped vegetables (onion, carrots, and jalapeno chilies) until they are soft and the onions are mostly translucent.  With about a minute to go, add the chopped garlic and saute.  Transfer the sauteed vegetables to the chili cooking pot.

Next brown the ground chicken and ground beef.  Once browned transfer the meats to the cooking pot minimizing any fat rendered during the browning.  A slotted spoon or spatula works well for this.

Now add the crushed tomatoes, diced tomatoes, and all of the dry spices and seasoning mixes.  Stir these in and return to a low simmer.  The chili will be quite thick at this point, so this is a good time to add the bottle of dark beer, or water if you prefer.  I personally like using dark beer because I think it really brings out and accentuates the chili spices' tastes.  But water is just fine too.

Next add the semi-sweet chocolate chips to the mixture.  This adds a little "Mexican mole" touch to the chili and does sweeten the chili a little bit.

Bring everything back to a simmer and cook covered for at least an hour on a very low heat.  At least 30 minutes before you plan to serve the chili, add the beans and the corn and let them heat through thoroughly.

Serve with some grated cheddar cheese and corn chips.  This is a hearty one-dish meal.

Thanks David for sharing your recipe, and for letting me recreate it with some modifications.
              
             ---Tom

Tuesday, December 6, 2011

Thanksgiving Wrap Up

Well, it's time to move on to the holidays.  Christmas is around the corner.  But I want to share a few last tips from this year's Thanksgiving.
Extra Turkey Breast Waiting to be Roasted
If you want lots of turkey sandwiches afterwards, consider buying an extra turkey breast.  The breast was surprisingly inexpensive.  I roasted it while we were enjoying our Thanksgiving meal.  

(Yes, I wish we had two ovens and didn't have to stage everything several layers high on the counters in our small kitchen.)


Thanksgiving Apple Pie
As far as pies go, I tried a few new things.
To keep pie crusts from burning, make a circle out of aluminum foil.  Tear off a sheet large enough to cover your pie plate, fold it in half, cut out a 9 or 10 circle, depending on the size of your pie plate, unfold, and place over the crust, if needed, during cooking.

Preheat a cookie sheet to go under the pie

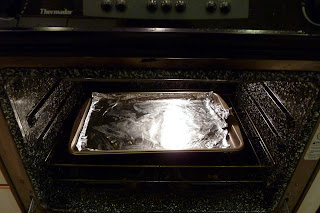
For crisper bottoms for pies, preheat a cookie sheet in the oven, and place your pie on it.  Saw this tip on TV.  It really works!  I also added aluminum foil in case I had any spill over, for easy cleanup.

Be sure to chill pie crust after rolling it out

Chilling the pie crust is important, so I didn't skip this step this year. 

Brush with milk, then sprinkle with sugar

For a nice crust on apple pie, brush it with milk and sprinkle it with sugar.

Nicely Browned and It Doesn't Collapse
Here's how it will turn out.

Creamy Chunky Applesauce

With the leftover apples (about 8) and the leftover 1/2 can of sweetened condensed milk, Sarah and I made an experiment.  We peeled the apples, cooked them down until they were chunky, added the juice of one lemon, a pinch of salt, and the sweetened condensed milk.  The result was a delicious creamy applesauce.  Tasted great on its own, but also in oatmeal.

We have so much to be thankful for, and I am grateful that we had a such a nice Thanksgiving this year with kids and grandkids.  It was one of the best!

B

Sunday, December 4, 2011

Grandma Hall's Bread Stuffing

Everyone seems to have a family tradition for making turkey stuffing, including us.

I use a simple bread stuffing recipe from my Grandma Hall.  I have to cut the recipe in third.  She cooked for a big crowd.

The title of her recipe says From Brazil - Thanksgiving Dinner, Dressing for 18.  The Brazil part is a mystery.  Maybe Grandma sent us the recipe when they were living in Brazil in the 60's?  (If anyone in the family remembers, please let me know!)

Anyway,  here's how to make Grandma Hall's bread stuffing.

Grandma Hall's Bread Stuffing
Dressing for 18

20 c. bread cut up
3 c. onion
3 c. celery
2 heaping Tbsp. sage
1 Tbsp. salt
1 Tbsp. pepper
6 cups chicken stock
8 whole eggs beaten
1 1/2 sticks butter

Buy the loaves of bread far in advance of Thanksgiving so they aren't fresh and soft.  You want stiff, dry bread.
I usually lay out the bread the night before, on top of the stove grill, so air can circulate around the slices and dry them out.  You could also toast them on a cookie sheet in a very low oven in a pinch.

I buy two loaves of potato bread.

Then on Thanksgiving morning, I pull out the roasting pan and cover, and pile up the hard bread, make my way to the TV 

to watch the Macy's Thanksgiving's Day parade while I pinch them up in to bite size pieces.   This year our 4 year old granddaughter, Grace, helped me break up the bread.


It is important to make them bite-size.  Don't get lazy.  Pinch, pinch, pinch.
When it is time to get the turkey ready, then start to make your stuffing.  Not too far in advance. 
Chop up the onions, and the celery.  You can saute them until soft, if you wish, but usually I don't because I am in a hurry to get the turkey in the oven.
Melt the butter and let it cool.
Whisk the eggs together.
Open the can(s) of chicken broth.
Get everything ready to assemble before you start.
Add the onions, celery, and sage to the brown and toss thoroughly.  Salt and pepper.  If you are short on celery, you can add celery seed, too.
Add the wet ingredients next.  
Use two spatulas to toss and coat until moist but not wet. One can of broth is usually enough, but have more on hand if needed.
LOOSELY stuff the turkey with the dressing.  Be sure to salt the cavities of the turkey beforehand.   
Cover with aluminum foil and grease up the turkey with olive oil or butter.  Salt and pepper it well.  (Slide some fresh herbs and butter under the skin, beforehand, too.)
Put the remaining stuffing into a separate casserole (2 quart).  Make sure it is wet enough.  I usally add about 1/2 can more of broth.  Cover tightly and bake for an hour at 350 degrees.
If you aren't going to bake the stuffing right away, be sure to refrigerate it until you do, due to the raw eggs.
B